Video length: 2 minutes 4 seconds
Artist website: www.u2.com
Musicians
The Edge (David Evans) – electric guitar
What makes this video great and what can you learn from it?
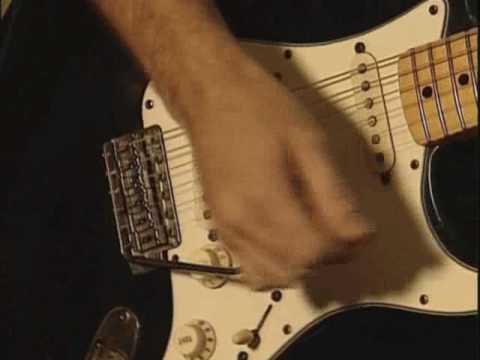
- The Edge demonstrates and talks about his favourite guitar part from the “The Joshua Tree” album.
- It’s a valuable reminder that there’s nothing wrong with playing simple stuff, especially when it supports the song.
What can you learn from the article?
- the chord progression not only for the outro of “With or Without You” but for the complete track
- the open-position (sus) chords used in this track
- how to play the single-note-based “melodic” suspension
- the KISS principle
Key Moments in “With or Without You” Outro Video
| technique/concept | video timestamp |
|---|---|
| Open-position (sus) chords | 0:26-0:45 |
| Melodic suspension | 1:01-1:17 |
| Natural harmonics | 1:18-1:40 |
| Whammy vibrato | 1:20-1:24 |
This will be relatively short – no 3000+ word monster like the Dominic Miller “Shape of My Heart” or Nuno Bettencourt “Flight of the Wounded Bumblebee” article. I’ll cover the significance and (to me) life-changing aspects of the “The Joshua Tree” album in a separate video/article combo about this song. Then I’ll also analyze the playing techniques, the role of the “Infinite” guitar, the effects, arranging devices used to keep the simple four-bar chord progression interesting, chord superimposition, suspensions, natural harmonics, production analysis etc. and some of the impressive stats concerning the album as well as U2’s career.
But now let’s focus on what’s relevant to this video only, ok?
Open-position (sus) Chords
I’d like to ask you a question. Imagine you are in the studio laying down tracks for your next album. You’ve developed a growing fan base over the last few years and have a shot at elevating your career to the next level with this release. Given that scenario, would you have played that same simple chord figure at the end of “With or Without You” that The Edge demonstrates in this video?
That cliche that has been played millions of times already? That’s so easy and beginner-like? Be honest …
Well, me neither. 🙂
This is actually my favourite guitar part from the whole album. And it’s one of the simplest.
The Edge – 0:19-0:24 in the video on this page
The temptation of launching into a solo or some kind of melodic lead part instead to fill the musical space for that fade-out most likely would have been too seductive. The song has been going on for 4:14 at this point. Except for the introductory four bars as well as the twelve measures preceding this launch into the outro the same four-chord progression has been used.
| D | A | Bm | G |
| I | V | vi | IV |
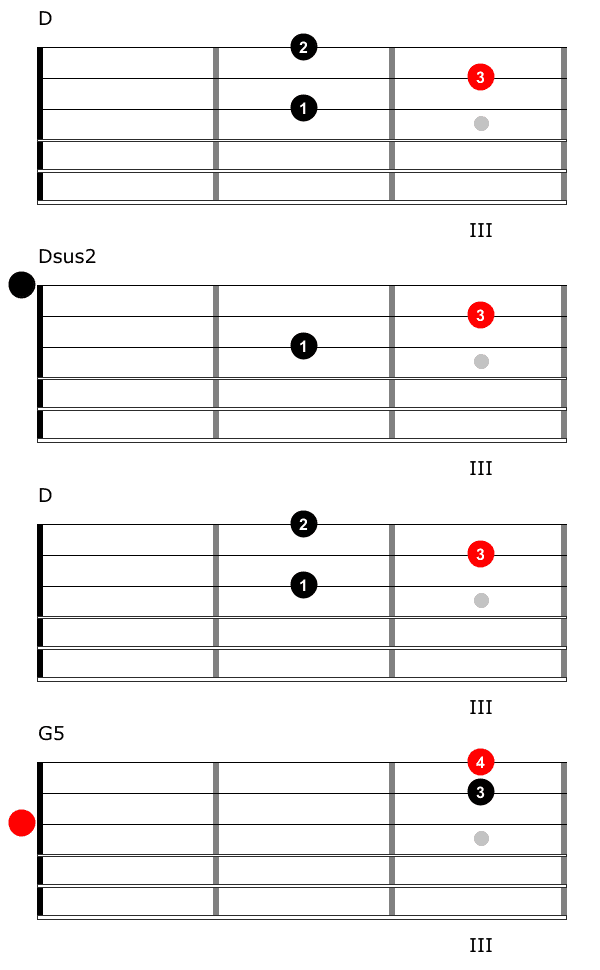
The Edge has a gift for coming up with the right part for the song – which most often is quite minimalistic and sparse. And he goes for atmosphere instead of flash. So he plays the simple chord figure D – Dsus2 – D – G5 (I’ve seen/heard The Edge play Dsus4 as well) in a simple off-beat rhythm. By lifting/or adding one finger The Edge creates a melodic line that hooks the listener’s attention.
Note: usually I tend to display the function of the notes in the chord diagrams. I’m making an exception here and show the fingerings instead. Not because it would be too difficult without the fingering information, but simply to avoid having to get into an explanation of chord and harmony superimposition at this point. Just in case you are wondering why there are no A or Bm chords presented in the diagrams. All that will be covered extensively when I publish the break-down of the concepts and techniques of the full track.

Open-position (sus) chords: 0:26 – 0:45 – back to overview
Melodic Suspension & Natural Harmonics
Yes, he adds an overdub of a single-note suspension figure to add a melodic element. And there is the “ear candy” produced by the delay effect and natural harmonics (1:18-1:40), but the underlying part is still so damn simple.
Have a look at the 2nd layer melodic suspension idea! It would be possible to take the identical (open position) chord voicings and arpeggiate them, but then you’d end up in the same register as the rhythm-oriented part. Chances would be high that the frequencies would clash and you’d lose sonic clarity.
By using a different fretboard position and a higher register you avoid that frequency clash. The two parts are distinctively different to not get in their way and therefore support each other.
The root note is on top. This is important information to keep in mind, because it allows you to easily transpose this shape/figure to other keys. Knowing this helps you “steal” this idea and incorporate it when playing other songs.

You alternate between the 4th and the major 3rd of the chord in the bottom voice. Again, this melodic change creates the hook that helps to keep the listener’s attention. Notice how you are switching between a perfect 5th and a minor 6th interval, which also creates interest due to the change in quality in a kind of “implied harmony” way.
Melodic suspension & natural harmonics: 1:01-1:17 & 1:18-1:40 – back to overview
Whammy Vibrato
“Normal” finger vibrato is not possible when playing natural harmonics or open strings. The only way to add vibrato is by using the whammy bar. Depending on factors like your guitar’s bridge and tremolo system, you’ll be able to either create vibrato only by lowering the pitch or change the pitch in both directions.
Vibrato adds a bit of personality to sustained notes and is a key technique to master. So, grab your whammy bar and develop a feel for when and how much whammy bar action to add when playing open-string notes and/or harmonics!
Whammy vibrato: 1:20-1:24 – back to overview
Conclusion
The KISS Principle – Simple Works
The KISS principle has nothing to do with the band of the same name. It’s rather an acronym that stands for “Keep It Simple, Stupid!” It’s a great reminder to focus on what works and not to get distracted thinking that every and any addition automatically truly adds value.
This to me is the big lesson of this video – and it’s one of the most valuable to learn. Don’t lose the end goal of the song out of sight. It might be difficult and sometimes painful to delete (or not to play in the first place) a cool part, but if the song is better because of it, then it’s the right thing to do.

We guitarists have a tendency to add layer upon layer of parts or to fill available space with lick after lick. However, most of the time this just gets in the way of the music and distracts the listener from what the song is all about.
Guitar parts don’t have to be complicated – it’s more important that they work for the song. So don’t feel goofy when playing the simple stuff – sometimes it takes more guts to play the right thing for the song than sticking in some “cool” licks just to impress the audience. The simple things can have the biggest impact.
… the most chilled, you know, kind of non-dramatic guitar part – I really got a kick out of doing that at the time.
The Edge – 1:56-2:04 in the video on this page
Sources
Keyboards Magazine (German) 2009/05
Get notified whenever I publish a new article!
Absolutely NO Spam – Unsubscribe Anytime.


